[Fix] PAGE FAULT IN NONPAGED AREA in Windows 10 (BSoD)
Blue Screen of Death or BSoD is known to be caused by a number of errors. One such error is PAGE FAULT IN NONPAGED AREA. And just like every other BSoD error, this one is also very frustrating to troubleshoot. But there’s nothing to worry about because we will help you solve this error.
The error Page_Fault_in_Nonpaged_Area in Windows 10 occurs when the operating system is unable to find a file within its memory, which should be there. Files like these can go missing due to an unsuccessful update, unsupported driver, some corrupt software or a faulty RAM. So, this error can happen due to both software and hardware reasons. But don’t worry, the error Page Fault in Nonpaged Area in Windows 10 is not so difficult to solve as much as it looks. In this guide, we will help you fix this error. Just follow our methods and their steps, and you will be free of BSoD in a few minutes.
![[Fix] PAGE FAULT IN NONPAGED AREA in Windows 10 (BSoD) | DeviceDaily.com [Fix] PAGE FAULT IN NONPAGED AREA in Windows 10 (BSoD) | DeviceDaily.com](https://www.devicedaily.com/wp-content/uploads/2017/11/001-Fix-PAGE-FAULT-IN-NONPAGED-AREA-in-Windows-10-BSoD.jpg)
How to Fix PAGE FAULT IN NONPAGED AREA in Windows 10
There are certain methods which you need to follow one by one. Anyone of these methods can fix the issue for you. So, if a method doesn’t work for you, try the next one.
1. Disk Check and Memory Check
As I’ve mentioned earlier, this error could be occurring due to a problem with your RAM. A corrupted NTFS volume can also cause this error. If these are causing the error, it can be fixed this way –
Step 1. Go to Cortana at the taskbar. Type command prompt. Right click on Command Prompt from results and select Run as administrator. This will open the Command prompt window.
![[Fix] PAGE FAULT IN NONPAGED AREA in Windows 10 (BSoD) | DeviceDaily.com [Fix] PAGE FAULT IN NONPAGED AREA in Windows 10 (BSoD) | DeviceDaily.com](https://www.devicedaily.com/wp-content/uploads/2017/11/002-Fix-PAGE-FAULT-IN-NONPAGED-AREA-in-Windows-10-BSoD.png)
Step 2. On the command prompt, type the command chkdsk /f /r and press Enter.
![[Fix] PAGE FAULT IN NONPAGED AREA in Windows 10 (BSoD) | DeviceDaily.com [Fix] PAGE FAULT IN NONPAGED AREA in Windows 10 (BSoD) | DeviceDaily.com](https://www.devicedaily.com/wp-content/uploads/2017/11/003-Fix-PAGE-FAULT-IN-NONPAGED-AREA-in-Windows-10-BSoD.jpg)
Step 3. Now, press “Y”. This will schedule to check the disk when you restart your computer the next time.
![[Fix] PAGE FAULT IN NONPAGED AREA in Windows 10 (BSoD) | DeviceDaily.com [Fix] PAGE FAULT IN NONPAGED AREA in Windows 10 (BSoD) | DeviceDaily.com](https://www.devicedaily.com/wp-content/uploads/2017/11/004-Fix-PAGE-FAULT-IN-NONPAGED-AREA-in-Windows-10-BSoD.jpg)
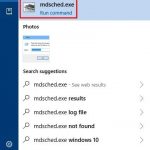
Step 4. Now we need to check the memory. Start by going to Cortana on the taskbar. Type mdsched.exe and press Enter.
![[Fix] PAGE FAULT IN NONPAGED AREA in Windows 10 (BSoD) | DeviceDaily.com [Fix] PAGE FAULT IN NONPAGED AREA in Windows 10 (BSoD) | DeviceDaily.com](https://www.devicedaily.com/wp-content/uploads/2017/11/005-Fix-PAGE-FAULT-IN-NONPAGED-AREA-in-Windows-10-BSoD.jpg)
Step 5. The last step will open Windows Memory Diagnostic window. Click on “Restart now and check for problems (recommended).” Before clicking on this, make sure you don’t have any unsaved file open, as this will restart your computer immediately.
![[Fix] PAGE FAULT IN NONPAGED AREA in Windows 10 (BSoD) | DeviceDaily.com [Fix] PAGE FAULT IN NONPAGED AREA in Windows 10 (BSoD) | DeviceDaily.com](https://www.devicedaily.com/wp-content/uploads/2017/11/006-Fix-PAGE-FAULT-IN-NONPAGED-AREA-in-Windows-10-BSoD.png)
Step 6. When your computer restarts, the Windows Memory Diagnostic Tool will run and check for problems. It might take 15 to 20 minutes, so have patience and let it complete the process.
After checking for problems, the computer will restart automatically and start Windows normally. Now, check if the problem page fault in non paged area still persists. This should solve the problem, but if you are still facing the error, try the next method.
2. Disable Automatic Paging File Size for All Drives
Disabling the automatic paging file size for all drives has seemed to work for many users. Follow the steps to do so.
Step 1. Open, File Explorer. You can also do this by pressing Windows logo key + E.
Step 2. On the left sidebar, right click on My PC and select Properties. This will open System properties.
![[Fix] PAGE FAULT IN NONPAGED AREA in Windows 10 (BSoD) | DeviceDaily.com [Fix] PAGE FAULT IN NONPAGED AREA in Windows 10 (BSoD) | DeviceDaily.com](https://www.devicedaily.com/wp-content/uploads/2017/11/007-Fix-PAGE-FAULT-IN-NONPAGED-AREA-in-Windows-10-BSoD.jpg)
Step 3. Select Advanced system settings from the left sidebar.
![[Fix] PAGE FAULT IN NONPAGED AREA in Windows 10 (BSoD) | DeviceDaily.com [Fix] PAGE FAULT IN NONPAGED AREA in Windows 10 (BSoD) | DeviceDaily.com](https://www.devicedaily.com/wp-content/uploads/2017/11/008-Fix-PAGE-FAULT-IN-NONPAGED-AREA-in-Windows-10-BSoD.jpg)
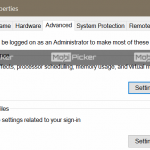
Step 4. Under Performance, select Settings.
![[Fix] PAGE FAULT IN NONPAGED AREA in Windows 10 (BSoD) | DeviceDaily.com [Fix] PAGE FAULT IN NONPAGED AREA in Windows 10 (BSoD) | DeviceDaily.com](https://www.devicedaily.com/wp-content/uploads/2017/11/009-Fix-PAGE-FAULT-IN-NONPAGED-AREA-in-Windows-10-BSoD.jpg)
Step 5. Select the Advanced tab and click on Change.
![[Fix] PAGE FAULT IN NONPAGED AREA in Windows 10 (BSoD) | DeviceDaily.com [Fix] PAGE FAULT IN NONPAGED AREA in Windows 10 (BSoD) | DeviceDaily.com](https://www.devicedaily.com/wp-content/uploads/2017/11/010-Fix-PAGE-FAULT-IN-NONPAGED-AREA-in-Windows-10-BSoD.jpg)
Step 6. Unmark “Automatically manage paging file size for all drives” if it is marked. Now click OK.
![[Fix] PAGE FAULT IN NONPAGED AREA in Windows 10 (BSoD) | DeviceDaily.com [Fix] PAGE FAULT IN NONPAGED AREA in Windows 10 (BSoD) | DeviceDaily.com](https://www.devicedaily.com/wp-content/uploads/2017/11/011-Fix-PAGE-FAULT-IN-NONPAGED-AREA-in-Windows-10-BSoD.jpg)
After performing the last step, restart your computer and check if the problem is solved. If the issue still persists, try the next method.
3. Disable Anti-virus (Third-party)
Antivirus can sometimes cause interference which can lead to the error page_fault_in_nonpaged_area in Windows 10.
Note: This can only happen when a third party antivirus is installed on the computer. So, if you are not using any third party antivirus and using just the Windows Defender, you can move on to the next method.
Now, you have to make sure that this is not the case with you. Open your antivirus and disable its protection for a few minutes (Here’s how to disable Avast temporarily). Check if this solves the problem. If this has fixed the issue, then uninstall your third-party antivirus and install some other antivirus.
4. Undo Changes
This has worked for many of our users facing the same issue. In case you have recently installed a hardware or some software on your computer, remove or uninstall them for a while. Check if it solves the problem for you.
5. Driver and Windows Update
As I mentioned in the introduction, the error Page Fault in Nonpaged Area in Windows 10 can also happen due to an unsuccessful update or an unsupported driver. In this method, you will have to make sure that your Windows operating system is updated to the latest version. Also, that your drivers are not causing this issue.
Update Windows
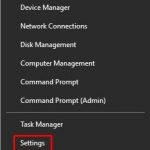
Step 1. Right-click on the Start button and select Settings.
![[Fix] PAGE FAULT IN NONPAGED AREA in Windows 10 (BSoD) | DeviceDaily.com [Fix] PAGE FAULT IN NONPAGED AREA in Windows 10 (BSoD) | DeviceDaily.com](https://www.devicedaily.com/wp-content/uploads/2017/11/012-Fix-PAGE-FAULT-IN-NONPAGED-AREA-in-Windows-10-BSoD.jpg)
Step 2. On Settings window, select Update & Security.
![[Fix] PAGE FAULT IN NONPAGED AREA in Windows 10 (BSoD) | DeviceDaily.com [Fix] PAGE FAULT IN NONPAGED AREA in Windows 10 (BSoD) | DeviceDaily.com](https://www.devicedaily.com/wp-content/uploads/2017/11/013-Fix-PAGE-FAULT-IN-NONPAGED-AREA-in-Windows-10-BSoD.jpg)
Step 3. On the right panel, click on Check for updates. This will check if there are any updates available to download and install on your computer. Let it check and install necessary files.
![[Fix] PAGE FAULT IN NONPAGED AREA in Windows 10 (BSoD) | DeviceDaily.com [Fix] PAGE FAULT IN NONPAGED AREA in Windows 10 (BSoD) | DeviceDaily.com](https://www.devicedaily.com/wp-content/uploads/2017/11/014-Fix-PAGE-FAULT-IN-NONPAGED-AREA-in-Windows-10-BSoD.jpg)
Update Drivers
Step 1. Right-click on the Start button and select Device manager.
![[Fix] PAGE FAULT IN NONPAGED AREA in Windows 10 (BSoD) | DeviceDaily.com [Fix] PAGE FAULT IN NONPAGED AREA in Windows 10 (BSoD) | DeviceDaily.com](https://www.devicedaily.com/wp-content/uploads/2017/11/015-Fix-PAGE-FAULT-IN-NONPAGED-AREA-in-Windows-10-BSoD.jpg)
Step 2. Here, you need to right click on hardware and select Update driver.
Note: You need to update the drivers for your Graphics Card (under Display Adapters) and Audio drivers (under Audio Inputs and Outputs). Also, don’t forget to update the drivers for every hardware that is connected to your computer externally or is a third party hardware.
![[Fix] PAGE FAULT IN NONPAGED AREA in Windows 10 (BSoD) | DeviceDaily.com [Fix] PAGE FAULT IN NONPAGED AREA in Windows 10 (BSoD) | DeviceDaily.com](https://www.devicedaily.com/wp-content/uploads/2017/11/016-Fix-PAGE-FAULT-IN-NONPAGED-AREA-in-Windows-10-BSoD.jpg)
Step 3. After clicking on Update driver, a small window will open. Here, select “Search automatically for updated driver software”. This will search for updates online and install it automatically.
![[Fix] PAGE FAULT IN NONPAGED AREA in Windows 10 (BSoD) | DeviceDaily.com [Fix] PAGE FAULT IN NONPAGED AREA in Windows 10 (BSoD) | DeviceDaily.com](https://www.devicedaily.com/wp-content/uploads/2017/11/017-Fix-PAGE-FAULT-IN-NONPAGED-AREA-in-Windows-10-BSoD.jpg)
After updating drivers, restart your Windows 10 PC. This should solve the issue. If the problem is still not solved, then the problem is with the hardware. Most probably it is the RAM which could be faulty. Although it is not recommended, if you know how to open the CPU or your laptop’s back panel, remove the RAM stick and check the issue. If there is more than one RAM stick, remove them one by one and check if it solves the issue. This is only recommended for users who know their way around computer hardware. If you are not sure about it, don’t try and contact your computer’s service center.
Conclusion
Blue Screen of Death a.k.a BSoD is a very annoying error screen. It has been irritating the Windows users for many years, on different Windows versions. The error Page Fault in Nonpaged Area in Windows 10 is one of most frustrating BSoD error. Hopefully, we were able to help you fix this issue using our methods. If you solved this problem with some other method, do mention it in comments below.
The post [Fix] PAGE FAULT IN NONPAGED AREA in Windows 10 (BSoD) appeared first on MobiPicker.
(240)

